Cakepoplicious - Red Velvet Cake Pops Recipe
- Jun 5, 2016
- 3 min read
Welcome to The Daily Sash loves, today I bring you my white chocolate red velvet cake pops! This is one of the easiest recipes ever, so much so, that even if you have no idea how to bake, I’m certain you’ll be able to make them.
So let’s get to it shall we? First things first, INGREDIENTS!

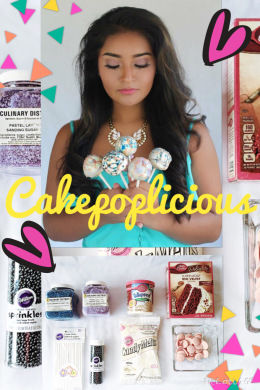
For this recipe you’ll need:
1 box of cake mix, I chose the “Super Moist Red Velvet cake mix from Delights by Betty Crocker”, because it’s my favorite. However, if you are more comfortable using other brands or want another flavor you can choose whatever you want, vanilla, strawberry, chocolate etc.
1 container of cream cheese frosting, or if you prefer any other flavor go ahead and get it.
For cake baking:
1 1/4 cups of water
1/2 vegetable oil
3 eggs
(Follow the ingredients listed on the cake mix packaging)
Decoration:
1 bag of white chocolate “Candy Melts”
1/2 bag of pink chocolate “Candy Melts”
1 bag of cookie sticks
Some black sugar pearls
Some decorative sugar (blue and lavender)
And that’s it!
Step 1:

For the baking of the cake, I follow the directions on my cake mix box. Preheat the oven to 350 degrees while mixing the water, vegetable oil, and eggs, together with the cake mix flour. This takes about 2 to 5 mins.
Pour the cake mix in a rounded metal container and set it to bake for about 40 mins.
Once it is done, let it cool for about 10 mins, or until it is okay to put your hands on it without burning them.
Step 2:

Bring the frosting in!! This step is very hands on! We will be using said hands to shape our cake pops, although actually we will be creating cake balls. Cut the cake in squares and put it in a container big enough where your hands can work freely. Add half of the frosting and use your hands to mix them together! This will create a paste, which we will be using to create little cake balls.
Take just a little bit of the paste and round it with your hands, just like play-doh. Be careful not to make them too big, just about the size of your palm. Set them on a plate once you’re done and put them in the freezer for about 30 mins.
Step 3:

While you’re waiting for your cake pops to get cold, you can get your candy melts, cookie sticks and decorative sugar ready for the next step, decoration!
To melt the candy melts, pour them in a microwave safe container and heat for about 1 min, take them out, and stir them until they lose their original shape. You can add one to two spoons of vegetable oil to help dissolve them. Once that is done, stir them again and heat for one min.
Take your cake balls out and while the chocolate is still hot and manageable, add the cookie sticks to them. For this, dip one end of your stick into the hot chocolate and insert it into one of the cake balls. Once you do that, take a spoon and add the chocolate on top of the cake pop until it’s completely covered. Let any excess drop before you put them to dry in either a glass, cup, or box (which is what I did). While the chocolate is still fresh decorate your cake pops as you like, at this point adding the black pearls or the decorative sugar as well as the pink candy melts. Repeat this step for all of your pops or until the chocolate runs out.
Leave them to dry for about 10 mins. Once the chocolate hardens, you are ready to package them or simply ENJOY them!


Cakepops can be one of the easiest gifts you can give to either family or friends, not only because the way to anybody’s heart is through their stomach (of course), but because we all know that spending your time (and talent) making something for someone else is worth more than any kind of purchased gift.
So spend this day having fun with your loved ones and let them know how much you care about them, or simply play some music, put your feet up, and enjoy them all by yourself!
Because there’s nothing wrong with having a day for YOU.
Don't forget to follow us on social media, @sashazavala on the Gram and The Daily Sash on Facebook to check on my latest adventures. Also don't be shy and share your creations with me and tag me at #thedailysash #cakepoplicious
Sincerely,

PC: Lesly Zavala Photography


Comments